Overseas Travel Visa Application: Your Budget Traveler's Guide

Key Takeaways
Navigating overseas travel visa applications can be complex. This guide covers the process, essential documents, costs, and tips for budget-conscious travelers.
Overseas Travel Visa Application: Your Budget Traveler's Guide
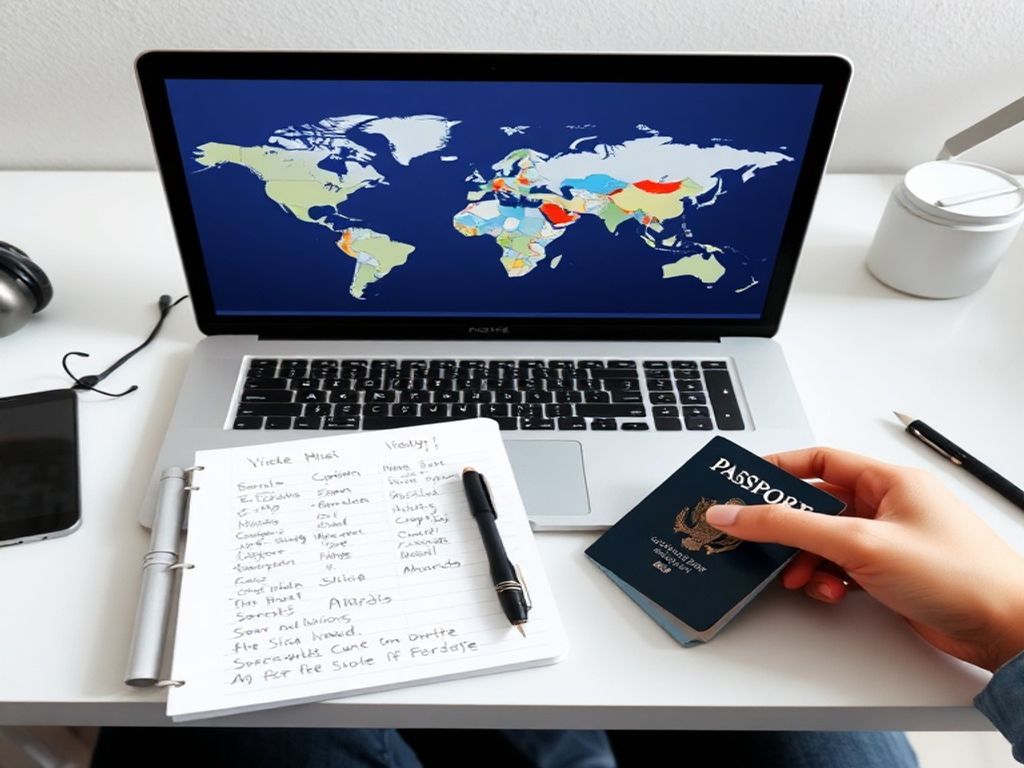
If you've ever dreamed of exploring beyond your home country but felt daunted by the process of applying for an overseas travel visa, you're not alone. For many domestic travel enthusiasts, the jump to international journeys introduces a new layer of planning: navigating visa requirements. My own travels, always reliant on buses, trains, and strict budget tracking, have taught me that understanding visa applications thoroughly is key to a smooth, affordable trip.
How Do I Start My Overseas Travel Visa Application?
The core answer to starting your overseas travel visa application is this: research, gather, apply, and wait. It might sound simple, but each step demands meticulous attention, especially when every dollar counts. From my perspective as a budget traveler, the initial research phase is paramount. It dictates everything from your destination choice to your timeline and overall trip cost.
Step 1: Destination Research and Visa Necessity
Before you even think about booking a flight or guesthouse, you need to confirm whether the country you wish to visit requires a visa for your nationality. Many countries offer visa-free entry or a visa-on-arrival option for short tourist stays, which is a fantastic budget-friendly bonus. However, a significant number of popular destinations, like the United States, certain parts of Europe (depending on your nationality and stay duration), or Australia, will require you to apply for a visa in advance. A quick search for '[Country Name] visa requirements for [Your Nationality]' will usually provide official government websites or embassy pages with the most up-to-date information. Do not rely on third-party travel blogs alone for this critical step – always cross-reference with official sources. This initial check can save you from planning an entire trip only to find out you can't enter without a lengthy application process.
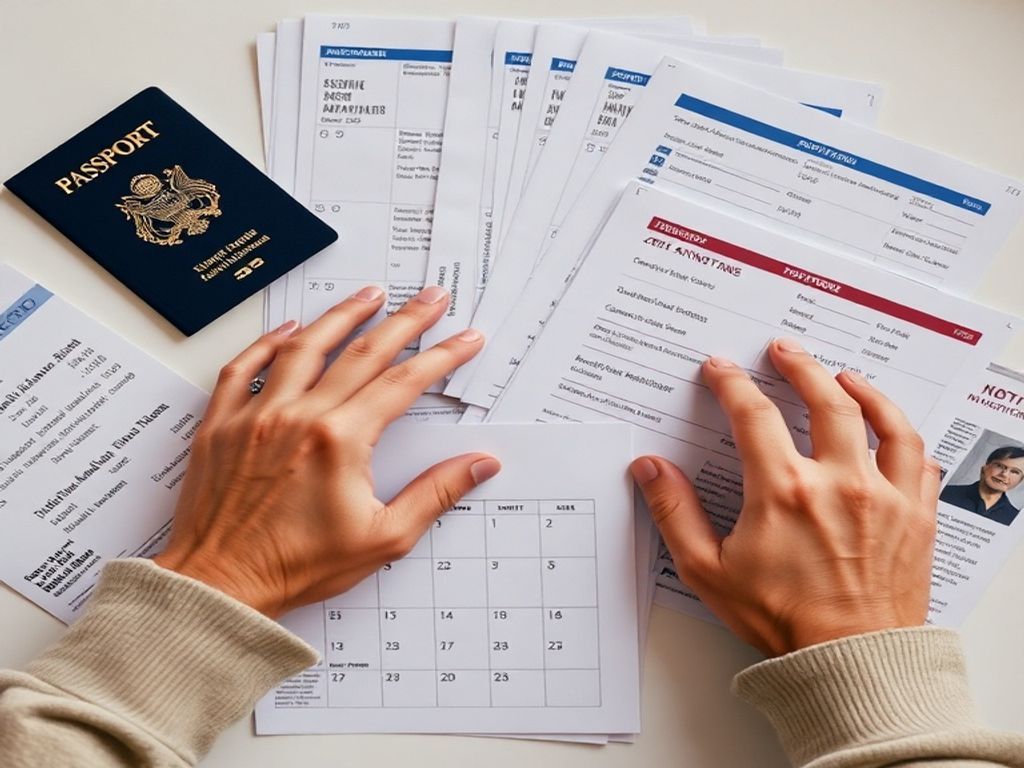
Step 2: Understanding Visa Types and Requirements
Once you confirm a visa is needed, the next step is to understand the specific type of visa required. For budget travelers, this most often means a tourist visa, but sometimes a transit visa might be necessary if you have a layover in a country that requires it, even if you don't plan to leave the airport. Each visa type has its own set of requirements, which can vary wildly.
Here's a general list of documents you might encounter, though specifics will differ:
- Valid Passport: Most countries require your passport to be valid for at least 6 months beyond your intended date of departure from their territory. Ensure it has enough blank pages (typically 2–4) for the visa sticker and entry/exit stamps.
- Visa Application Form: This is usually an online form, but some countries still require a physical, hand-filled form. Be incredibly precise with every detail.
- Passport-sized Photographs: Generally 2–3 recent photos meeting specific dimensions and background color requirements. For example, the Schengen Area typically requires a 35x45mm photo with a light background.
- Proof of Accommodation: Bookings for guesthouses, hostels, or Airbnb rentals for your entire stay. For my trips, I usually book cancellable options initially to keep flexibility until the visa is approved.
- Flight Itinerary: Proof of onward or return travel. Again, I often use cancellable flight reservations or just a detailed itinerary if full booking isn't required upfront.
- Proof of Sufficient Funds: This is crucial for budget travelers. You need to demonstrate you can support yourself financially during your trip without working illegally. This typically means recent bank statements (often showing the last 3–6 months of activity) or a letter from your bank. Specific daily amounts are often stated – for instance, some countries might expect proof of around $50–$100 per day of your stay.
- Travel Itinerary: A day-by-day plan outlining your activities, cities you'll visit, and transportation methods (e.g., specific bus or train routes). This shows genuine tourist intent.
- Travel Insurance: Increasingly mandatory for many destinations, especially in Europe. Coverage minimums (e.g., €30,000 for medical emergencies and repatriation) are common.
- No-Objection Letter (NOC): If you are employed, a letter from your employer stating your leave dates and that you will return to your job. For students, a letter from your educational institution.
- Visa Fee: This can range from approximately $30 to $200 or more, depending on the country and visa type. Always factor this into your budget early. Some countries require payment in local currency or specific methods like bank drafts.
What are the Common Pitfalls in Visa Applications?
After several international trips and helping friends navigate their first visa applications, I've identified several common pitfalls that can delay or even derail your travel plans. Avoiding these is paramount for a stress-free experience, especially when you're on a tight schedule and budget.
1. Incomplete or Inaccurate Documentation
This is, by far, the most frequent reason for visa rejection or delays. Every single document requested must be provided, and all information must match exactly. For example, if your application states your passport number as 'A1234567' but the actual passport is 'A12345678', that single digit error can cause a rejection. Similarly, if a bank statement is required for the last three months, providing only two months or one that's older than specified will not suffice.
Warning: Always double-check expiry dates on all documents, particularly your passport. Many countries require your passport to be valid for at least six months *beyond
- your intended departure date from their country. Even if your passport is valid for your entire trip, if it expires in four months after you plan to leave, it could be rejected.
2. Insufficient Proof of Funds
For budget travelers, this can be a particular challenge. While I meticulously track every dollar, embassies want to see that you have *sufficient
- funds, not just *enough
- to scrape by. They want reassurance you won't become a financial burden or seek illegal employment. If a country specifies you need proof of $100 per day for a 10-day trip, you must show at least $1,000 in your bank account, and preferably more, to demonstrate a comfortable buffer. Presenting only the bare minimum can sometimes raise red flags.
3. Not Applying Early Enough
Visa processing times are not immediate. They can vary dramatically from a few days to several weeks, or even months for more complex visas or during peak travel seasons. I've personally seen processing times range from 5 business days for a simple tourist visa to over a month for a more involved application. Always check the estimated processing time on the official embassy website for your specific visa type and nationality, and then add a buffer of at least 2–3 weeks. Applying too close to your travel date is a recipe for stress and potentially missed flights.
Warning: Never book non-refundable flights or accommodation before your visa is approved and in hand. A visa rejection or delay means you could lose hundreds of dollars in pre-paid expenses.
4. Lack of a Clear Travel Itinerary or Purpose
Consular officers want to understand your travel plans. A vague itinerary that simply says 'touring' without specific cities, dates, or planned activities can be viewed with suspicion. Even for my budget-friendly trips, where I rely on local buses and often decide on the fly, I always prepare a detailed *proposed
- itinerary for visa purposes. This includes specific guesthouse names (even if cancellable), bus routes I *plan
- to take, and a general outline of activities for each day. This demonstrates genuine tourist intent and reduces the likelihood of being perceived as an immigration risk.
5. Incorrect Visa Application Fees and Payment Methods
Visa fees are non-refundable, and if paid incorrectly, your application will likely be rejected. Some embassies require payment via bank transfer, others by credit card, and some even demand specific currency or cashier's checks. Always confirm the exact fee and accepted payment method. For example, a friend once had their application delayed because they tried to pay a €60 Schengen visa fee in US dollars at a consulate that only accepted euros or a specific bank draft.
How Can I Minimize Visa Application Costs?
As a budget traveler, minimizing every cost is second nature. Visa applications, with their fees and associated expenses, can add up quickly. Here’s how I approach keeping those costs down:
- Choose Visa-Free Destinations: The absolute best way to save on visa costs is to travel to countries where your nationality enjoys visa-free entry or visa-on-arrival. This eliminates the fee entirely and simplifies the planning process immensely.
- Compare Visa Fees: If you have multiple destination options that all require a visa, compare their respective fees. Some countries charge significantly more than others. For example, a tourist visa for Country A might be $40, while for Country B, it's $150. This can influence my destination choice if all else is equal.
- DIY Application: Avoid visa agents or third-party services unless absolutely necessary. While they can simplify the process, they add substantial service fees, often $50–$100 or more per application. With careful reading and preparation, you can complete most applications yourself.
- Print Documents at Home: Printing costs for dozens of pages of bank statements, itineraries, and forms can add up if you rely on print shops. Invest in a basic home printer if you travel frequently, or find a cheap printing service. I always try to print at my guesthouse if they offer a reasonable rate.
- Passport Photos: Instead of using expensive photo booths, look for local photography shops that offer passport photo services. In my experience, these are often significantly cheaper than official visa centers. Ensure they meet the exact specifications (size, background color) as rejection due to incorrect photos is common.
- Bank Statements: Most embassies accept printed online bank statements. You usually don't need to pay for certified statements unless specifically requested. Just ensure the statements clearly show your name, account number, and transaction history.
- Travel Insurance: Compare policies from multiple providers. Websites often allow you to get quotes quickly. Look for policies that meet the minimum requirements of your destination country without adding unnecessary bells and whistles you don't need. I always opt for basic but comprehensive medical coverage over fancy add-ons.
- Transportation to Embassy/Consulate: If an in-person interview or document submission is required, factor in the cost of bus or train tickets to reach the embassy. If it's a long journey, consider if it's feasible to combine it with other errands to save on travel time and costs.
What is the Typical Visa Application Timeline?
Understanding the timeline is critical for a smooth visa application process. From my experience, rushing leads to mistakes and stress. Here's a general breakdown:
Initial Research (1–3 days): Confirm visa necessity, gather official requirements, and understand application procedures.
Document Gathering (1–2 weeks): This is often the longest phase. It involves requesting bank statements, employer letters, booking provisional accommodations, obtaining travel insurance, and getting passport photos. Some documents, like bank statements, might take a few business days to process.
Application Form Completion (1–3 days): Meticulously fill out the online or physical form. This often involves reviewing all details multiple times.
Submission (1 day): Submit your application either online, by mail, or in person at the embassy/consulate or a visa application center. If an appointment is needed, book it well in advance (often 2–4 weeks out).
Processing (1 week to 3 months): This is the waiting period. Standard tourist visas often take 2–4 weeks, but complex cases or peak seasons can extend this. Some countries offer expedited processing for an additional fee, but this is usually not a budget-friendly option.
Visa Collection/Delivery (1–3 days): Once approved, you either collect your passport with the visa sticker or it's mailed back to you. Specific Example: For a Schengen visa from my home country, I typically start my application process at least 8 weeks before my intended travel date. This gives me a 2-week buffer for document gathering, another 2 weeks for potential appointment booking, and then a 4-week window for processing. This allows for any unforeseen delays without panicking about losing my bus tickets.
Conclusion: Your Path to Seamless Overseas Travel
Navigating overseas travel visa applications can seem daunting, especially for those new to international trips or committed to a strict budget. However, with a systematic approach, it's entirely manageable. The three key takeaways are: meticulous research, thorough document preparation, and early application. By understanding the specific requirements for your destination, gathering all necessary paperwork accurately, and submitting your application well in advance, you can significantly reduce stress and avoid costly mistakes.
My personal philosophy of tracking every dollar extends to visa planning too – consider all associated costs and build them into your overall travel budget. Don't let the visa process deter you from experiencing the incredible adventure of international travel.
Your action for today: Identify your dream overseas destination and immediately check its official visa requirements for your nationality. This crucial first step will set you on the path to your next great adventure.
Previous
2-Night, 3-Day Domestic Travel: Your Ultimate Office Worker Checklist
Next
Overseas Travel Visa Application: Your Budget Traveler's Guide
More in Travel

Kuala Lumpur Travel Guide: Essential Packing and Preparation
Prepare for your Kuala Lumpur trip with this expert guide on packing, seasonal weather, and local dining. Essential tips for a smooth Malaysian adventure.

India Travel Prep: Essential Backpacking Checklist
Planning to backpack in India? This essential checklist covers visa, health, packing, safety, and more to ensure a smooth adventure.

Low-Cost Carrier Tips: Essential Precautions for Budget Travelers
Low-cost carrier tips for backpackers. Learn how to avoid hidden fees, manage strict baggage limits, and navigate secondary airports to save money on travel.

Travel Insurance: Your Easy Guide
Don't let unexpected events ruin your trip. Learn how to get travel insurance with this easy-to-follow checklist and tips for weekend travelers.